
Making Fire Cider for Immune Health
What the heck is fire cider?
It’s an immune boosting tonic that uses fresh herbs, organic raw apple cider vinegar, along with a few other simple ingredients straight from nature for a supercharged infusion! The beauty of this easy- to -make tonic, is that the ingredients used are already healers all on their own. The tonic combines their healing properties and the result is this magical infusion with a spicy kick that has the power to prevent and treat the common cold and flu! It boasts some of the most powerful immune-boosting, anti-inflammatory, anti-bacterial, anti-viral, and decongestant properties you will in a food based remedy! Hence, making fire cider at home to support your immune health is something you want to try now (it’s not too late) I promise.
In fact, even though this magical concoction rises in popularity during cold and flu season, it’s not the only time it can be used. On the contrary, fire cider can also can help support your immune health throughout the entire year too! It can help with things like coughs, sinus congestion, and even aid with digestion. Sound too good to be true? Well it isn’t I promise, and I am going to teach you step by step how to make this at home so that you too can be equipped next time your kid comes home from school snotty nosed, telling you they don’t feel so good (yet again). But first let’s see when fire cider first appeared on the scene to support immune health.
Where does fire cider come from?
If you’re like me, and you want to cross your T’s and dot your I’s before jumping on the bandwagon, I get it. Here’s a little history on fire cider, and it’s tonic goodness.
Rosemary Gladstar
The genius behind this fiery tonic is Rosemary Gladstar, a pioneer in the herbalist community. She coined the term in the early 1980’s at the California school of herbal studies, where she worked. Rosemary wanted to bring medicinal herbalism back into people’s kitchens, creating ways to see food and medicine as one (my kind of gal). Forty years later and that wish keeps gaining traction. It seems like the amount of people that are making fire cider to support their immune health grows every year! Can I get a heck yes?!
Want to learn more about herbs from Rosemary? Check out her book Medicinal Herbs, A Beginners Guide. It’s a great resource for those looking to learn more about herbs from the Queen herself.
What are the benefits of making fire cider?
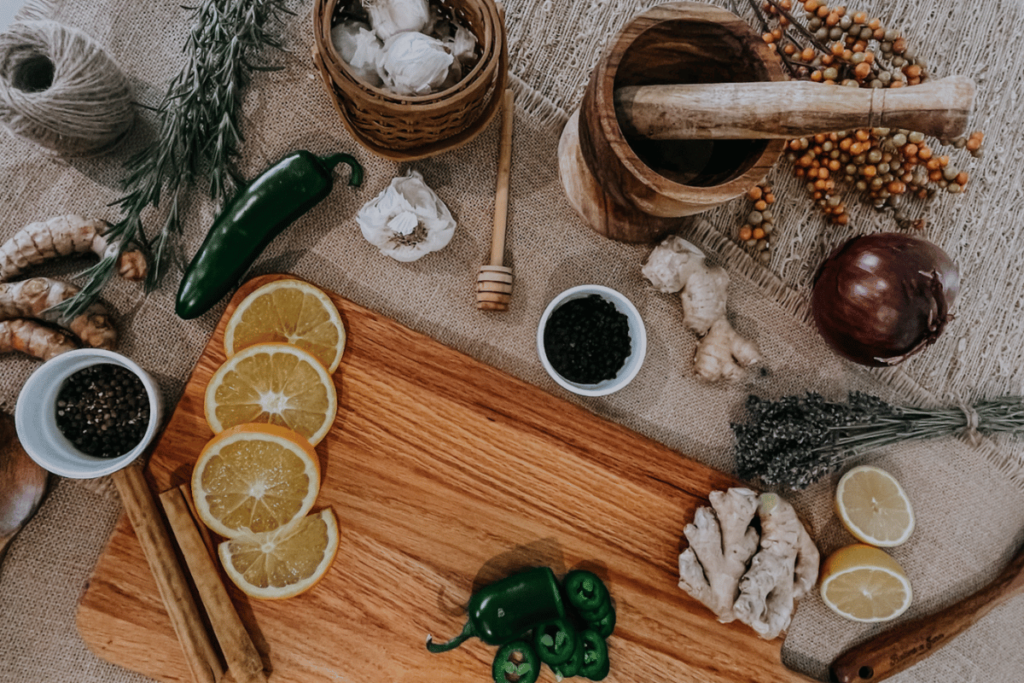
Making fire cider infusions with vinegar is an easy way to aide the ingredients used in releasing their minerals and beneficial compounds. Let’s take a look at the main ingredients (those in the OG recipe) that you will use to make your batch and how they support immune health. It’s always important to try and use organic ingredients as often as you can.
Apple Cider Vinegar
Organic, unfiltered, apple cider vinegar has tons of beneficial enzymes and probiotics. This makes it good to use if you are experiencing an upset stomach, nausea, bloating, or indigestion. It also has antimicrobial properties. When used in fire cider, it helps to both infuse the herbs and act as a preservative.
Ginger Root
Oh ginger. Likely one of my favorite spices on the list due both to its delicious smell and sweet and peppery taste. Ginger has been used medicinally for thousands of years, for many of its healing properties. It is a “warm plant” and as such it adds heat to the tonic. This means that ginger will add decongestant properties to the fire cider. Watch out mucus! It also is known to help reduce inflammation as well as speed up digestion and aid in circulatory function.
Horseradish Root
Ok guys, this is one powerful herb. First of all, it contains lots of folate making it rich in antioxidants. Hence protecting the body from damage by free radicals. Additionally it contains properties that can help aide with respiratory conditions such as the flu, bronchitis, or the common cold. But it can also help with things like sinus infections too since it helps to break up congestion. As a mama with asthma, the benefits of finding a natural remedy that helps reduce inflammation, and helps my body break up congestion is amazing!
Tumeric Root
This little orange root, contains curcumin, which has been shown to exhibit antioxidant, anti-inflammatory, antiviral, antibacterial, antifungal and other properties. Man what a powerhouse!
Garlic
Garlic is antimicrobial and has antibacterial, antifungal, and antiviral effects. This is mostly due to it’s key immune-stimulating nutrient, allicin. Allicin has been found to help our body defend against some forms of infection and help boost our immune system. It has also been used as a powerful antioxidant. However, as a general rule of thumb you should should consume garlic raw in order to obtain most of its benefits. Heating garlic changes the chemical composition of sulfur compounds and reduces their potency. I always take some raw garlic whenever I feel anything coming on! Grab a clove, chop it up, let it become activated for about 10 minutes and then take that baby right up just like I would any other pill!
Onion
Onion is similar to garlic in that it contains allicin too! So you will get those same immune stimulating nutrients that you do with garlic. In addition, onions some equipped with tons of antioxidants like vitamin C and quercetin plus minerals like potassium and sulfur. They are also a great source of B vitamins, including B6 and B9. If you take a lesson with you here, cook with more onions (even if your like me and cry the entire time) they really are packed with nutrients!
Jalapeno/Hot pepper
I’m not a fan of things that are too spicy but there’s a reason why these little suckers are in here! Hot peppers such as jalapeno are rich in capsaicin, which has antimicrobial properties. Want to know an interesting fact too? Jalapeños contain more Vitamin C then oranges! Heck, I was surprised too, and honestly a little bit impressed. Vitamin C is essential in fighting respiratory conditions, so off-course I added a good amount to my fire cider. Other benefits of adding jalapeños when making fire cider for immune support: managing inflammation, boost metabolism, and stimulate circulation.
Honey
When it comes to making fire cider to support immune health, off course we can’t leave honey out! This ingredient will not be added until the infusion is actually ready to use, but nonetheless it add tons of benefits. Honey has potent antibacterial and antiviral properties. Additionally, because it has anti-inflammatory effects it can help to soothe those raw and inflamed tissue be it lungs or throat!
It is also highly nutritious, being rich in vitamins and minerals, as well as antioxidants, so you are getting all of those benefits as well. Lastly, honey gives the fire cider that tang of sweetness to balance some of the fiery intensity of the spiciness, making it easier to enjoy (especially for your littles)!
Optional Ingredients
The beauty of fire cider is that you can customize as you wish! I decided to add peppercorns, lavender, cloves, rosemary, lemons, cinnamon, and orange. You may wish to add these ingredients too or another herb you love. It really is totally up to you. Here are the benefits of the optionals I added.
Black Peppercorns
Rich in antioxidants such as piperine, black pepper increases the absorption of other nutrients and helps the body manage inflammation, reduce fevers, and more.
Lavender
Oh I am obsessed with lavender. The smell, the color, the beauty of it. I knew right away that I had to add it to the tonic! Lavender has been used for thousands of years for many of it’s benefits. It is an antioxidant , as well as helps improve mood and reduce stress. I use lavender oil almost on the daily, but I knew it would be a great addition to the fire cider too.
Cloves
If you like pumpkin spice then you my friend like cloves. Their distinctive smell gives me that nostalgic holiday feel, think gingerbread cookies or pumpkin spice lattes. But not only do cloves taste oh so sweet they can help fight inflammation and infections, and are rich in antioxidants, like eugenol which help reduce oxidative stress!
Rosemary
This herb has been used by folk for thousands of years and it is still widely used today. Rosemary is loaded with antioxidants, it can help reduce inflammation, improve circulation, and generally supports our immune system.
Cinnamon
I really love cinnamon, it’s good for so many things, and makes things just taste a little better. When I comes to my kids taking fire cider, I throw some cinnamon in there to balance the flavors a bit. Just like so many of the spices described cinnamon too has natural antimicrobial, antibiotic, antifungal and antiviral properties! Give it a try, I don’t think you’ll regret it.
Lemon/Oranges
Rich in vitamin C, lemons give the fire cider that extra boost in antioxidants too. I used both lemons and oranges in my recipe but you can choose one or the other if you prefer. The orange helps with the flavor if you have small kids at home!
RECIPE
The exciting thing about fire cider for immune health is that you can play around with it, get creative and add or take out ingredients per your preference! It’s always nice to be able to add ingredients that are available to you locally and seasonally to ensure freshness! I decided to use the original ingredients, and keep all of that healing goodness, but I also added a few of some things I thought my kids would enjoy! I also made this recipe oiiin a smaller mason jar because I was a bit late in the season and I wanted to have it be ready sooner rather then later! Again, you can decide what ingredients, and what amount you’d like to make. Here is my variation below.
Per 24 oz jar (that’s what I used) :
I used all organic and fresh ingredients, while you can certainly replace fresh with powder or dried, I would still try to use organic as much as possible!
11 cloves of garlic
1/2 cup of fresh grated horseradish root
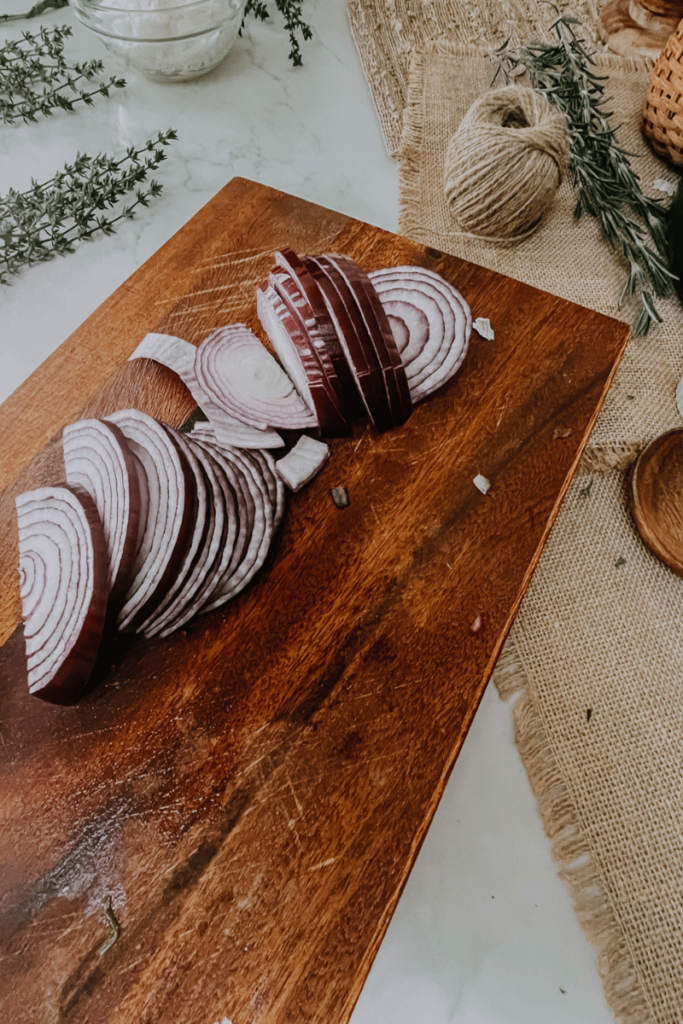
1/4 red onion sliced
1 Jalapeno chopped
1/4 cup ginger root peeled and grated
1/4 cup of fresh turmeric root
Raw Unpausterized Apple Cider Vinegar- enough to fill up, submerge all the other ingredients, and fill to the top- just about 16 oz.
Raw local honey- this is added later, see below
Optional ingredients
1 lemon zest and Juice
1/4 orange, sliced
1 tbsp whole cloves
3 Lavender sprigs
3 Rosemary Springs
1 tsp peppercorns
INSTRUCTIONS
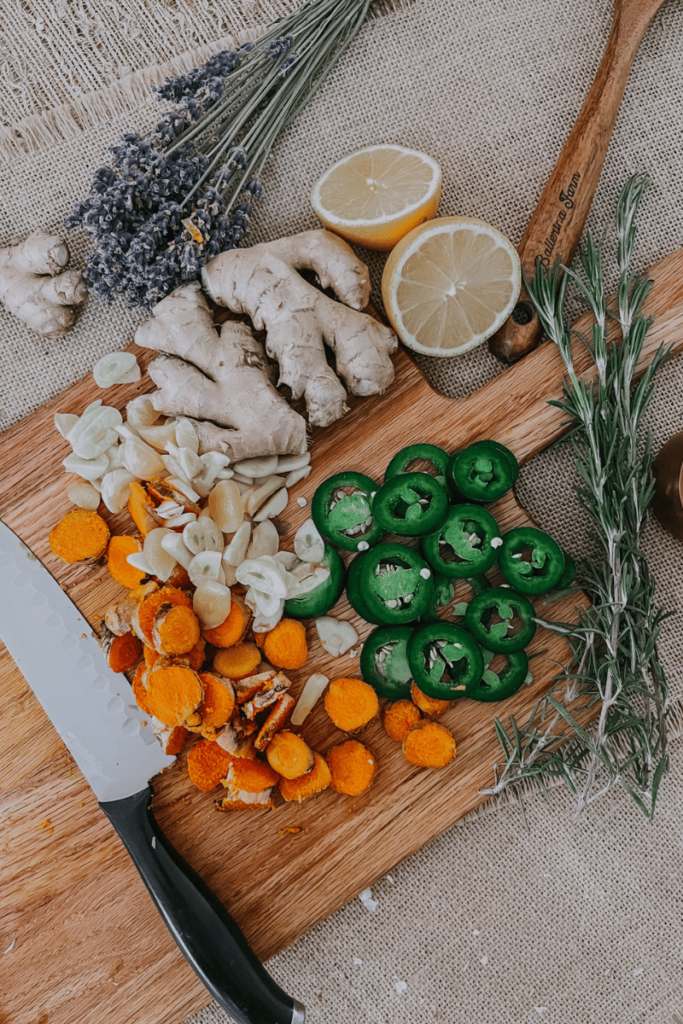
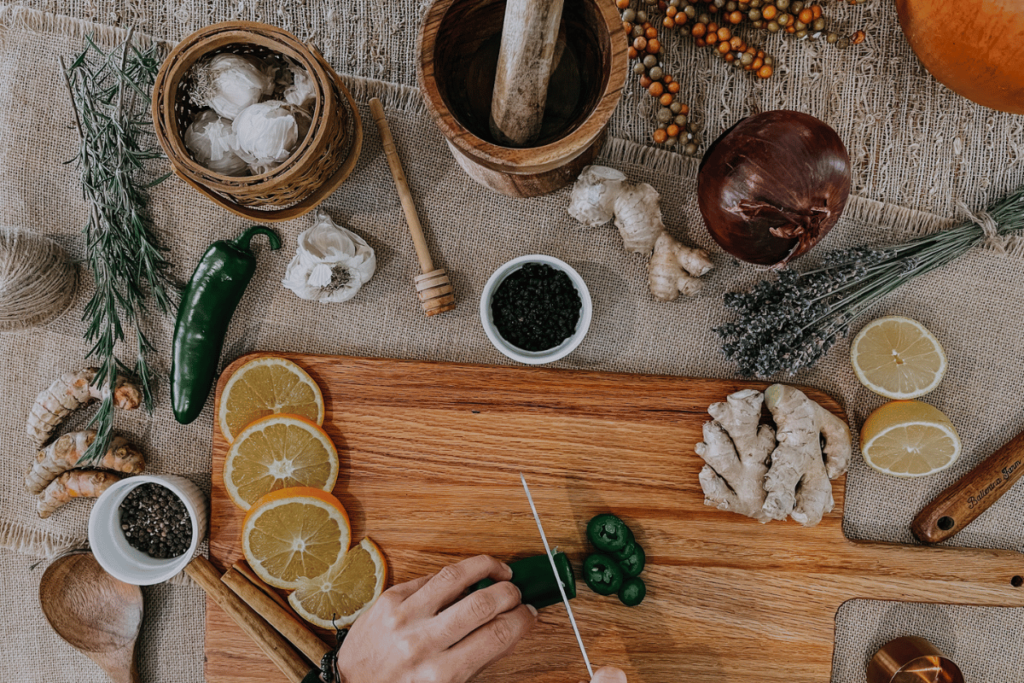
Step 1: Prep
Prep all of your ingredients! Put on some music, your favorite podcast, and get to work. Some of them require chopping, other slicing or grating. Have fun and enjoy the process!
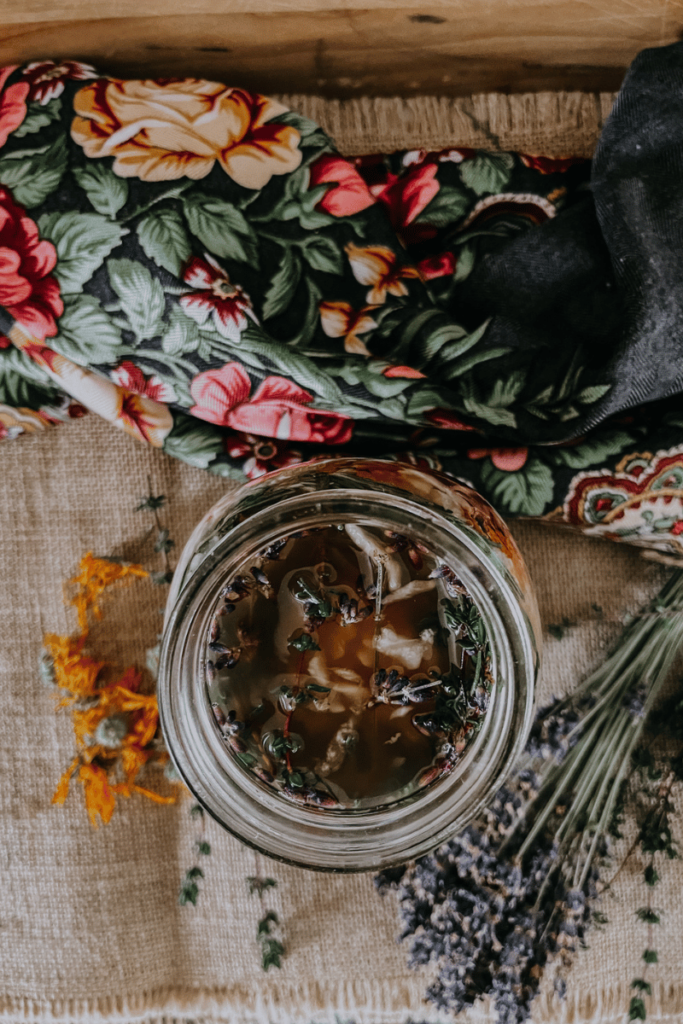
Step 2: Fill the jar
Ok, now it’s time to fill your jar of choice, yay! This is seriously my favorite step you guys it looks SO beautiful! What can I say, Im a gal for all kinds of pretty herbal infusions! I like to layer each ingredient of choice one by one, just keep this in mind, the more you fill your jar with the ingredients, the less end product you will have. Why? Because you will have less room to fill with the ACV, so my recommendation is that you fill jar about 3/4 full. That should do the trick.
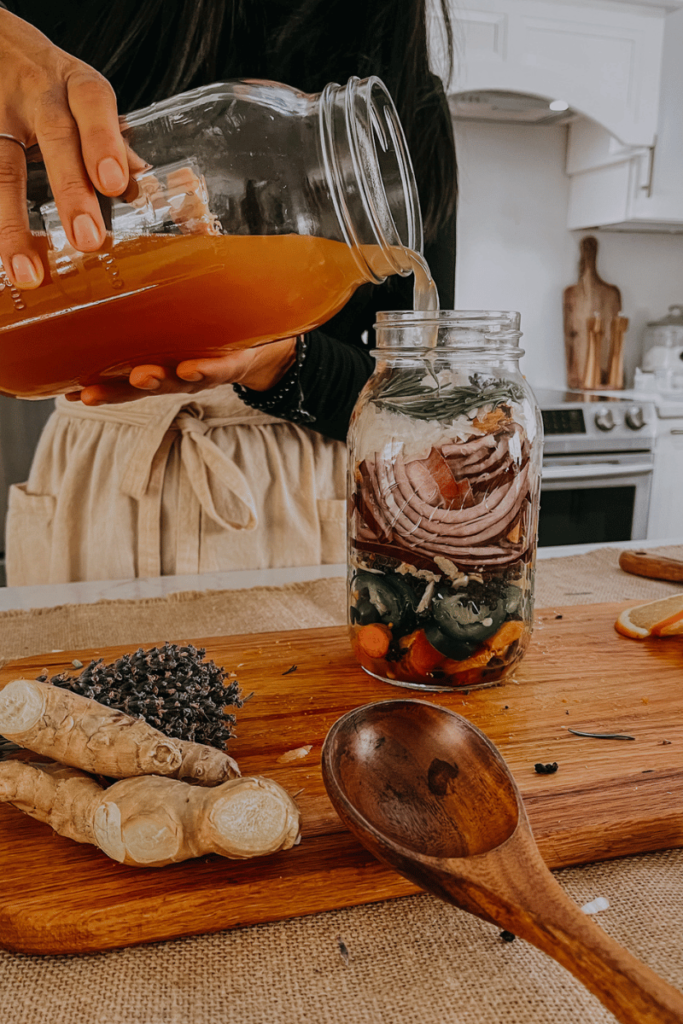
Step 3: Pour
Slowly, but surely pour the apple cider vinegar into the jar. Making sure that it covers everything and that it reaches the top of the jar.
Step 4: Cover
If you have plastic lids you can go ahead and cover your jar and give it a good shake. If you don’t have plastic lids(preferable BPA-free plastic mason jar lids), then you can go ahead and grab a piece of parchment paper, and place it on top of the jar before placing the lid on. This is simply so that the vinegar won’t touch the lid and corrode the top.
Step 5: Infuse & Shake
Once you fill the infusion, you can give it a good shake. You want to store it at room temperature somewhere cool, but also somewhere that you will remember to give it a shake once in a while!
You don’t have to shake it daily, but you should aim for several times per week. I did it twice per week and that seemed to work just fine! This will help to minimize the likelihood of developing mold.
Step 6: Strain
If you used a 24 oz jar you can likely strain after 3 weeks, however if you used a larger container you probably want to wait a bit longer. At a minimum you want to infuse the fire cider for at least 3 weeks but you can leave it for longer then that! I used a metal mesh strainer in order get all that liquid gold! At this point, go ahead and give those solids a good squeeze with a wooden spoon (or your hand) in order to ensure that you squeeze out as much liquid as possible.
Step 7: Honey
At this point you can go ahead and add your honey! I add a generous amount because otherwise my kiddos likely will refuse to even take a whiff of this concoction (maybe you can relate). We love to use local honey as this will provide most health benefits. We use about 1/2 cup of honey, yes this may sound like a lot but it does sweeten it up quite a bit! You can use 1/4 cup if you are not trying to convince your smaller humans that this is GOOD for you.
Honey can be a bit tricky to dilute completely, so here is what you can try. Warm up some water and place amount of honey to be used in a glass container to melt a bit. Remember that heating up honey too much can kill the beneficial properties, so do not overdo the heat here! Once you get it to melt a bit add it to infusion and whisk quickly! That should help a bit.
Step 8: Bottle
Now it’s time to bottle up your fire cider! Using a funnel, pour into your preferred choice of bottle, as long as it’s glass and has a good seal. You can store finished bottles in the refrigerator or any other cool dark place!
Your fire cider should be good to use for 6 months or more as long as you don’t see anything weird and gross growing in it (mold). If it tastes the same, it’s good to drink!
Step 9: Drink Up
Drink Up mamas! If you are using this as a preventative measure during the fall you can take a tbsp daily alone or in a glass of warm water! However, if you are feeling a cold coming on, it it wise to up your dose! Taking an oz several times per day can be helpful at this point. Remember to shake the bottle before pouring because you want to make sure to catch any goodness that may have settled at the bottom!
Thanks for reading friends!
Have you made your own fire cider for immune health? I’d love to hear from you what your favorite way of making this fun infusion is! Comment below. Please feel free to ask questions, or to share this post!